This is a list of my professional filmmaking gear that I use for filmmaking to create professional cinematographic images on a medium budget.
We filmed “It’s not me” in just Three Days. Yeah! Just three days. Just like a 48 hours challenge to keep our filmmaking skills improving. 48 Hour Challenges are a good way to sharpen your filmmaking skills. Why not put that pressure to yourself?
We are moving from the casual amateur filmmaker spectrum to the professional side. Gear is expensive, so you have to buy the gear little by little. This is the reason I created this post, to help you find the professional gear if you are being serious about becoming a full-time filmmaker.
So, let’s go dive into…
The Filmmaking Gear.
Camera
We used the Blackmagic URSA Mini pro because it’s an affordable professional cinema camera with 15 stops of Dynamic Range and superb color rendition.
I love this camera! the footage is cinematic and the quality is just incredible.
The things you can do with the footage in post are amazing, such as extreme color grading, resizing, and even changing the color temperature.
Lenses
Sigma 18-35mm T2 Cine
I mostly used the 18-35mm Cine Sigma Lens. The image quality is amazing. It is sharp with a nice bokeh. I am particularly attracted to shallow depth of field and this lens achieves it so nice with it’s 2.0 aperture.
The bad thing about having shallow depth of field is that focusing is really hard. In this short I had to pull the dolly, pan and tilt the camera, and keep her in focus at the same time. We did several shots until I was able to coordinate all that with my brain and my hands. I really appreciate that she was really patient with me.
Funny story!
She had to prepare for a shot where she had to be emotionally involved, and I was still practicing with the camera movement. Then, when she and I were finally ready, the dog, who has not made any noise the whole night, started snoring exactly at that time. Funny but also frustrating because it was late and we were really tired.
The 18-35mm was used on all of the wide shots.
Rokinon 85mm
We also used the 85mm lens from Rokinon. It was used in the phone close ups, and in the exterior close up of the intruder.
Sigma 10mm Fish Eye
Another lens we used was a 10mm Fish-eye from Sigma. Why do I have that lens? I don’t even know, but I’m glad I had it to shoot the Peep hole shot with it.
I usually shoot with only one lens because it usually creates a uniform style. I only change it if the story and the shot really, really needs it. In this short film, the 85mm and the 10mm were needed to tell the story.
Support
Shoulder Rig
The camera already mounted on the came-tv shoulder rig. It includes the Matte Box and the Follow Focus.
The came-tv follow focus is so helpful because you just set the marks and move the dial at the right time. It was hard for me to do it, though, because, as I said before, I was doing more things at the same time. Having a follow focus system is the most practical thing you can do with your lenses.
IMPORTANT!
Don’t Forget to get the Tripod Mounting Plate plate, so that you can attach the rig to your tripod!
The Tripod
Although most of the shots are moving, I had the camera on a Manfrotto Tripod most of the time, except for the shot when she finds the phone on the nightstand.
Having a Tripod is a must and this one is a professional tripod that will get you good results while panning or tilting. It takes practice and muscle memory.
Dolly

I had recently bought a Glide Gear dolly and a 12 ft straight track.
I wanted to have an emotional dolly movement that would track her as she discovers the intruder outside her apartment.
To be honest, this short film was made just to test this dolly. I am so happy that it worked. It is not a 2,000 dollars dolly, but hey! It works, and looks great! Right?
Lights
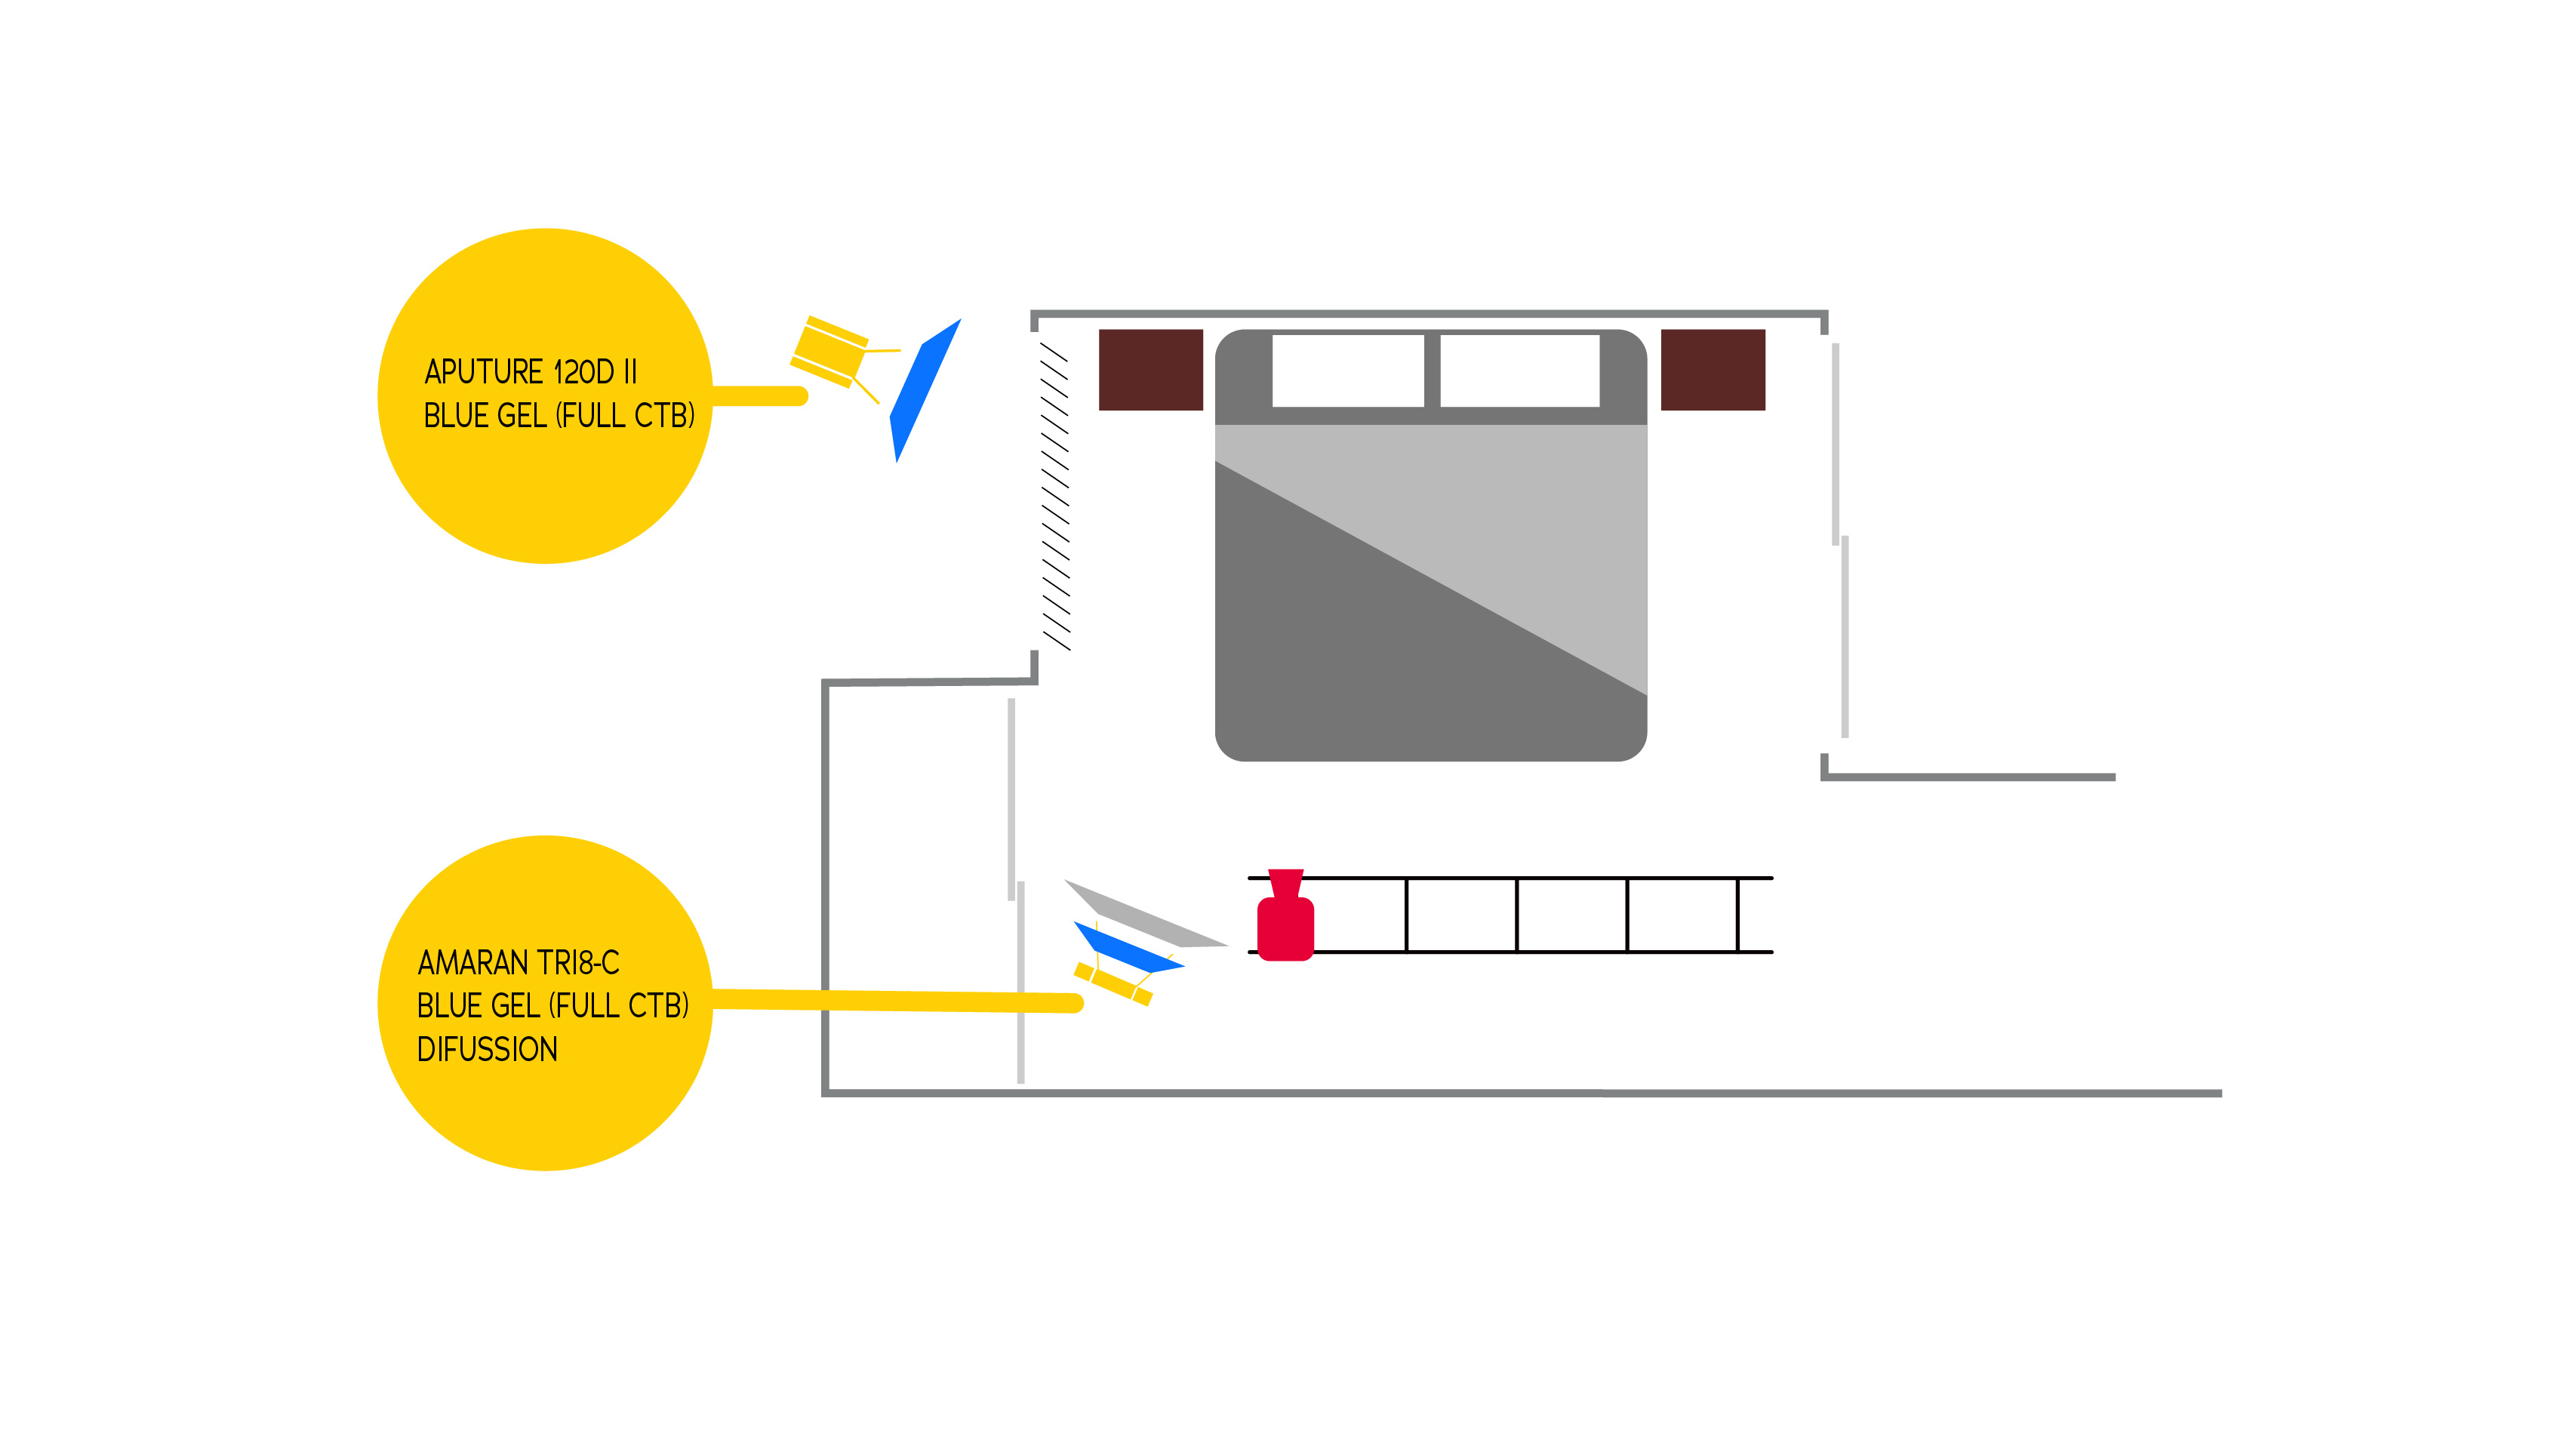
I used mainly the Aputure 120D and an Amaran Tri8-c.
In the bedroom scene, The Aputure was put just outside the window and the blinds created the shadows needed for the mood. The Tri8-c was diffused and had a blue gel on it to create an overal diffused light.
For the living room scene, we kept the 120D outside and used the Tri8-c bouncing on the wall simulating the moon light.
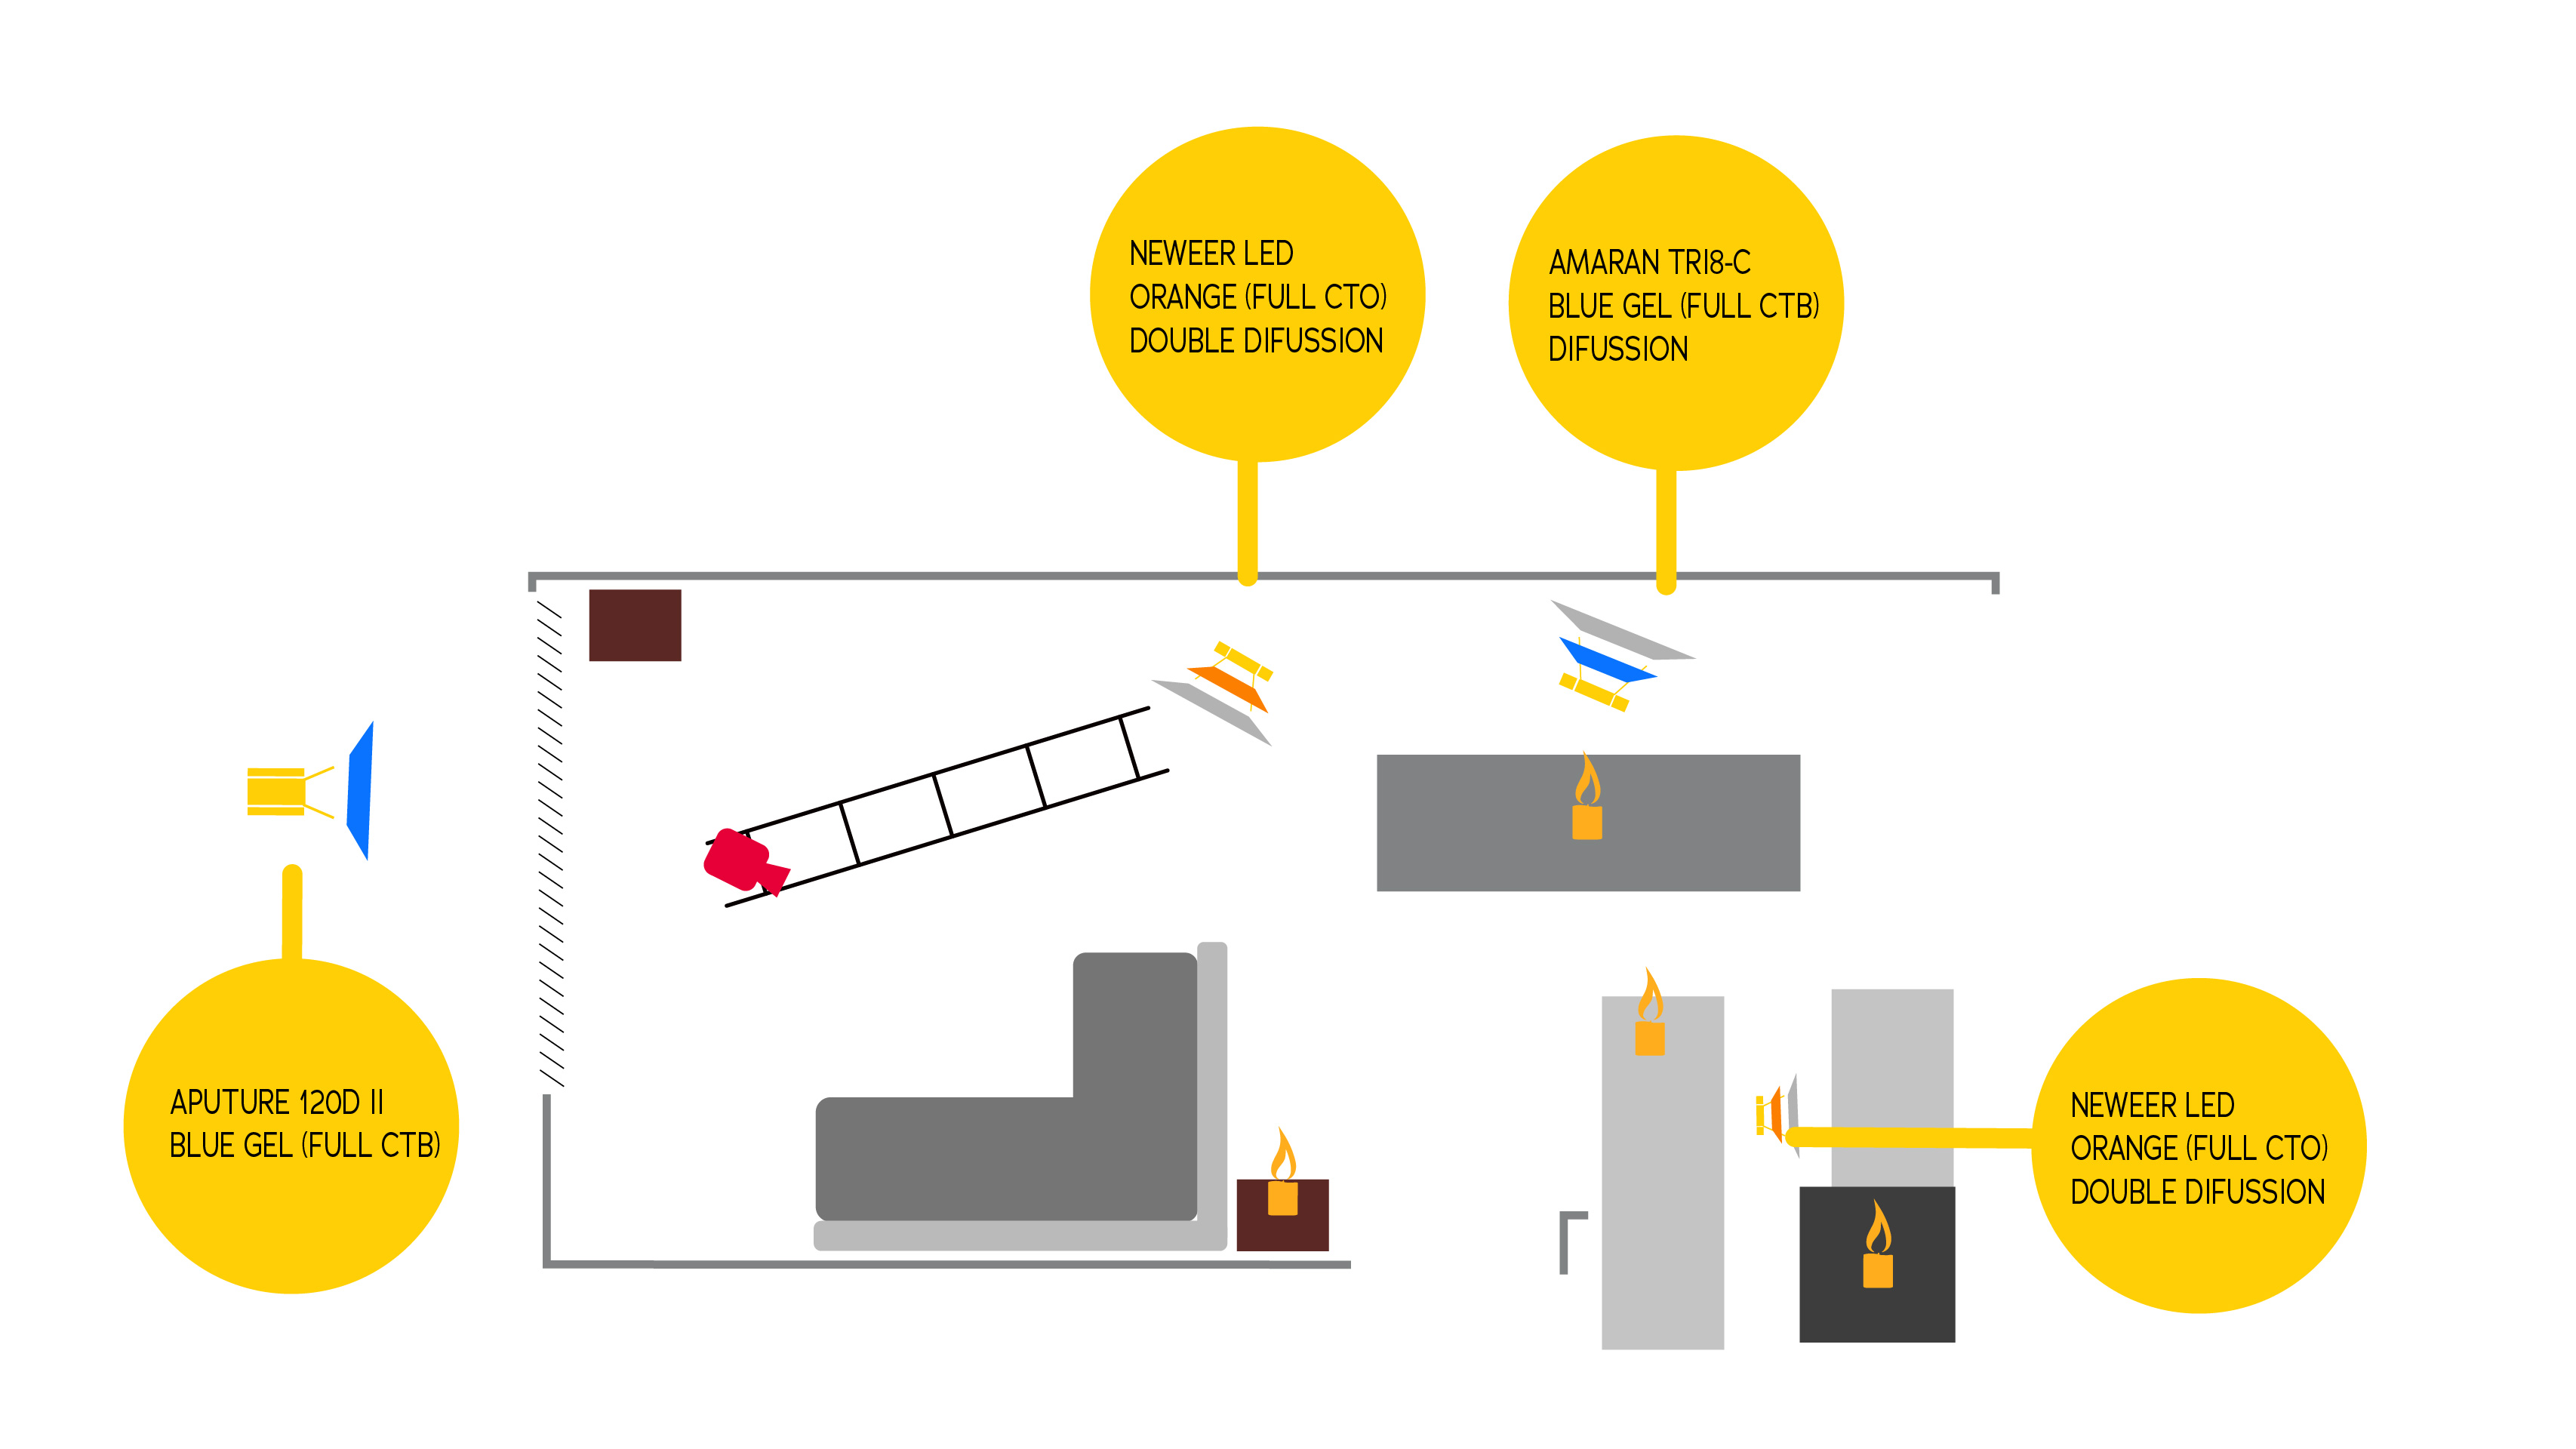
2 extra LED panels were used to mimic the orange light coming from the candles. One behind the counter and another one on her right.
Mics
The mic we used was a Senheiser MKE 600 on a Rode Pole and we plugged in directly to the camera. With this mic, you have to be really careful, it is mostly for exterior use and run and gun. It can get some weird echoing effects if you use it indoors.
Software
I edited it all on davinci resolve. Including the audio mix and color correction. I use mac because I am used to the mac os environment. The black eyes of the evil twin were made on after effects. No prosthetics used, we cannot afford it. It’s all after effects.
So, this was the filmmaking gear we used to get the results you see in the short. We still have a lot of things to improve, we are getting more cinematic and professional results.
